ImageLab Documentation
Documentation contains steps to setup your environment and get started with contributions.
Please make sure, you have joined the project’s official gitter channel for further discussions
related to the project.

Outline
- Setting up the environment.
- Setting up the project.
- Starting Contribution.
- Adding new OpenCV operations.
- Updating Docs.
1. Setting up the environment
This section describes how to setup your environment in order to get started contributions to ImageLab.
1.1 Setup Java on your machine
Java is the primary language that has been used to develop ImageLab. Specifically, we have used java 1.8.0 since it ships with JavaFX. Moreover, JavaFX has been used to develop the GUI of the ImageLab.
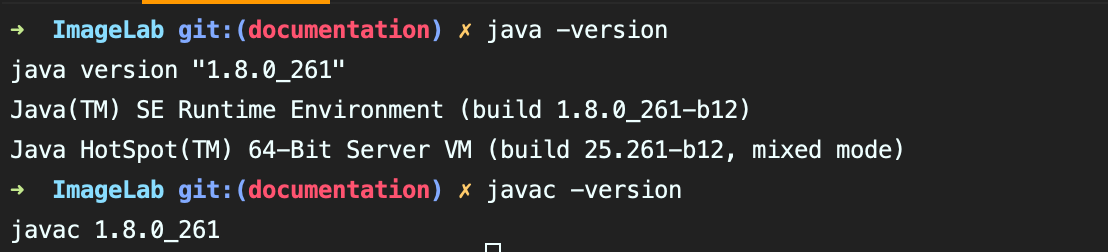
Run the following commands to verify java version and the runtime.
java -version
To verify java compilers.
javac -version
If you’re getting an output like below, you can skip this part and continue with maven setup.
If you haven’t installed java previously, you need to have java 1.8.0 in your local machine to run ImageLab.
Download java 1.8.0 JDK from here.
Follow the instruction given below based on your OS.
1.2 Setting up maven
Maven has been used as the build automation and dependency management tool for ImageLab. In order to build and run ImageLab you need to have maven installed on your local machine.
Run following commands to verify that you have installed maven on your machine.
mvn -v
If you haven’t installed maven you need to download maven zip file from here.
Prerequisites for maven
- You need to have java installed on your machine.
- Ensure
JAVA_HOMEenvironment variable is set and points to your JDK installation.
How to setup
Extract distribution archive in any directory using an archive extraction tool or running following commands.
unzip apache-maven-3.6.3-bin.zip
or
tar xzvf apache-maven-3.6.3-bin.tar.gz
Add the bin directory of the created directory
apache-maven-3.6.3 to the PATH environment variable.
Confirm with mvn -v in a new shell. The result should look similar
to the following result.

Useful links
2. Setting up the project
Cone the repository by pasting following command in your terminal.
git clone https://github.com/scorelab/ImageLab.git
Open the project in your preferred IDE. It will take a couple of minutes to sync with the project related maven dependencies.
Then navigate to the project directory in terminal and type following command to build the project.
mvn clean install
To run tests
mvn clean test
To skip tests and run the project.
mvn install -Dmaven.test.skip=true
Once the project build is successful, in order to execute the project run following command in the terminal.
mvn exec:java
3. Starting Contribution
This section contains the information of project structure and its usage. including the contributing guidelines and good practises related to the project.
Following illustration shows the project folder structure.
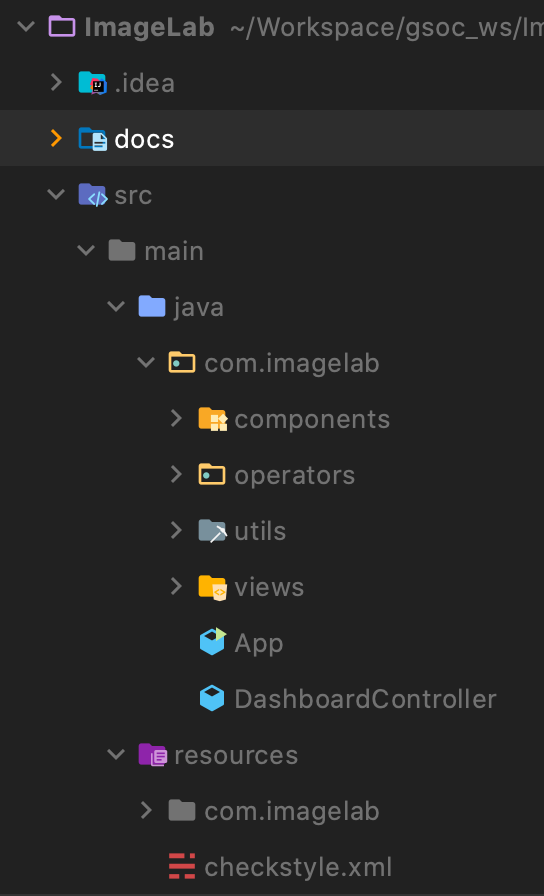
docs- this directory contains the documentation related jekyll site.src- contains the app related java classes.main/java- contains the application classes.main/resources- resource files.
In the main/java/com/imagelab we have
components- which contains all the UI elements related classes.operators- openCV operators related classes.utills- utility classes which has been reused in the other classes.views- application views related to the app.views.forms- application views related to properties pane of a particular operator
and
App.java - contains the main method and other methods to load the FXML resource files related to the
application GUI. Also, this class contains javaFX related GUI loading functionalities as well.
DashboardController.java - which works as the controller for all the views and it contains the GUI related
functionalities as well.
4. Adding new OpenCV operations
This section contains the steps to add new openCV operations to the project. Developer has to follow four step procedure in order to add a new operator to the appliation.
4.1 Add operation to imagelab/operators/ as a java class.
Make sure that your OpenCV operator has clear boundaries and has clear usecases.Decide how the operator should integrate with the pipeline and required opencv packages are included in the dependencies. For more information refer the official OpenCV documentation OpenCV operations.
4.2 Extend OpenCVOperator abstract class.
In this step you need to implement the methods from the super class which gives you access to validate –> allowed operators –> compute the logic.
Following is a code snippet which shoes how the demo operator look like.
public class OperatorName extends OpenCVOperator{

    //To have the logic realted to prevoious operator validation.
     @Override
        public boolean validate(OpenCVOperator previous) {
            return false;
     }

    //To have the openCV processing logic.
     @Override
         public Mat compute(Mat image) {
             return null;
     }

    //To have the allowed operators for this operator.
    @Override
        public Set<Class<?>> allowedOperators() {
            return null;
    }
}
In addition to above this operator can hold anything related to the openCV operator such as information related to the operation or any additional logic.
4.3 Add a breif description about the operator to the public enumInformation
Use the public enum Information has a OPERATOR_INFO variable to add the operator desctiption.It will automatically loaded to the information pane when the operator dropped to the pipeline.
Following code snippet code shows the information enum where you need to add the operator description.
public enum Information{
	OPERATOR_INFO{
		public String toString() {
			return "Color Maps\n\n"
                +" Colormaps can apply different color maps to an image using this method.OpenCV caters various other types of colormaps methods where you can find in the properties pane.All these types are represents by predefined static fields(fixed values).";

		}
	}
}
Now the final code will look like this,
public class OperatorName extends OpenCVOperator{

    //To have the logic realted to prevoious operator validation.
     @Override
        public boolean validate(OpenCVOperator previous) {
            return false;
     }

    //To have the openCV processing logic.
     @Override
         public Mat compute(Mat image) {
             return null;
     }

    //To have the allowed operators for this operator.
    @Override
        public Set<Class<?>> allowedOperators() {
            return null;
    }

    //Operator description to be display at the information pane
    public enum Information{
        OPERATOR_INFO{
            public String toString() {
                return "Operator desciption";

            }
        }
    }
}
4.4 Add your operator properties to a separate view form to display at PropertiesPane
In this step, you can define the required properties in order to calibrate your operator. The more properties you provide, it will beneficial for the end user to use the operator in a robust manner. Most importantly, implement the properties with preserving UI/UX aspects.
As the first step create a java class inside the com.imagelab.view.forms with a meaningful name and extend that class with AbstractPropertiesForm.
Then include your properties using javafx scene elements and return all the scene elements to the anchorpane using a return function. To safguard the code quality make sure to comment all your workings.
4.5 Add your implemented operator to the controller class
After implementing your OpenCV operation it needs to include to the relevant controller class in order to proceed for the next steps.
When adding to the controllers make sure that to include it for the most suitable operator class. You can investigate the image lab dashboard side bar and decide to which operation category and for what you should insert your newly developed operation. As an example DrawCircle.java operator to the DrawingOperatorController.java.
These are already provided controller classes in the application.
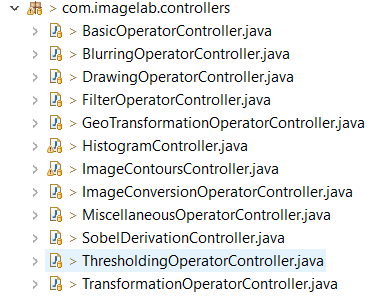
If your operator doesn’t align with the above controller classes, You can create a new controller class.
Inside a particular controller, create a new function with a proper and meaningful name to register your operator under the desired controller class.
Following is sample code snippet related to operator registration.
//newOperatorName UI element function.
public static OperatorUIElement operatorElementName() {
OperatorUIElement newOperatorName = new OperatorUIElement() {

    @Override
    public AbstractInformationUI buildInformationUI() {
    // return the information pane.
        return null;
    }

    @Override
    public AbstractPropertiesFormUI buildPropertiesFormUI() {
    // return the properties pane.
        return null;
    }
    };
newOperatorName.operator = new OperatorName();
newOperatorName.operatorId = OperatorName.class.getCanonicalName();
newOperatorName.operatorName = "OPERATOR-NAME";
newOperatorName.elementStyleId = "newOperatorName";
newOperatorName.buildElement();
}
// ... other controller functions
}
below code snippet despite a usecase of how DrawCircle OpenCV operator has been added to DrawingOperatorControllercontroller class.
public class DrawingOperatorController {
    // controller function for DrawCircle operator
	public static OperatorUIElement drawCircleEffectElement() {
		//drawCircle UI element.
        OperatorUIElement drawCircleEffect = new OperatorUIElement() {
            @Override
            public AbstractInformationUI buildInformationUI() {
                return new InformationContainerView(DrawCircle
                        .Information.OPERATOR_INFO.toString());
            }

            @Override
            public AbstractPropertiesForm buildPropertiesFormUI() {
                return new DrawCirclePropertiesForm((DrawCircle) this.operator);
            }
        };
        drawCircleEffect.operator = new DrawCircle();
        drawCircleEffect.operatorId = DrawCircle.class.getCanonicalName();
        drawCircleEffect.operatorName = "DRAW-CIRCLE";
        drawCircleEffect.elementStyleId = "drawCircle";
        drawCircleEffect.buildElement();
        return drawCircleEffect;
	}
    // other functions

}
4.6 Register your newly developed operator.
For this you need to navigation to imagelab/DashboardController.java and register your
newly developed operator under the relevant controller initialize method.
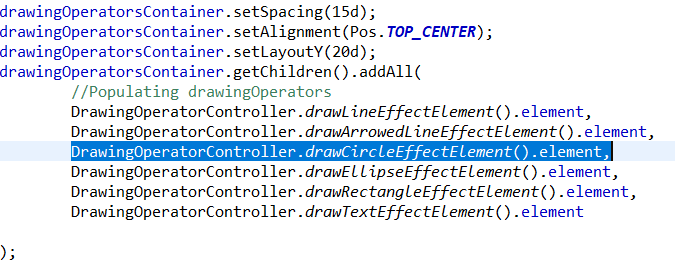
So at the runtime, it will populate at the dashboard side bar under desired operation category.Based on that create a FXML binding in theDashboardController.java and insert the operator to that container to populate it in the dashboard.
4.7 Add styles to operator.
Navigate to the resources/styles.css and add styles with the style ID you assigned when you register
the operator.
4.8 Run and play with the newly created operator
Run the App.java file and see whether your newly created operator is working as expected.
5. Updating Docs
This section contains the steps to update documentation related to this project.
5.1 Prerequisites for the docs site.
You need to install following technologies in order to run the docs site locally.
- Ruby 2.7
- Jekyll 4.1
5.2 Run Documentation offline.
To install relevant dependencies run the following command.
bundle install
bundle update
To run the documentation jekyll website, run following command.
--livereload flag will enable you to populate your changes realtime on your browser.
bundle exec jekyll serve --livereload
This site will run on your browser at localhost:4000